At Altruic Advisors, our CFO Solutions team uses QuickBooks Online for cloud accounting. Our clients and accountants love the flexibility that QBO provides. QuickBooks Online has several different plans to fit your organization’s needs, and makes it easy to access your financial records on the go.
If your organization uses Quickbooks Online, there are a few advanced settings you may not be aware of. We always recommend reviewing these three settings to help streamline your accounting and protect your QBO account.
Advanced Settings: Closing Date
After logging in to QuickBooks Online, click on the gear icon in the upper-right corner then select Account and Settings.
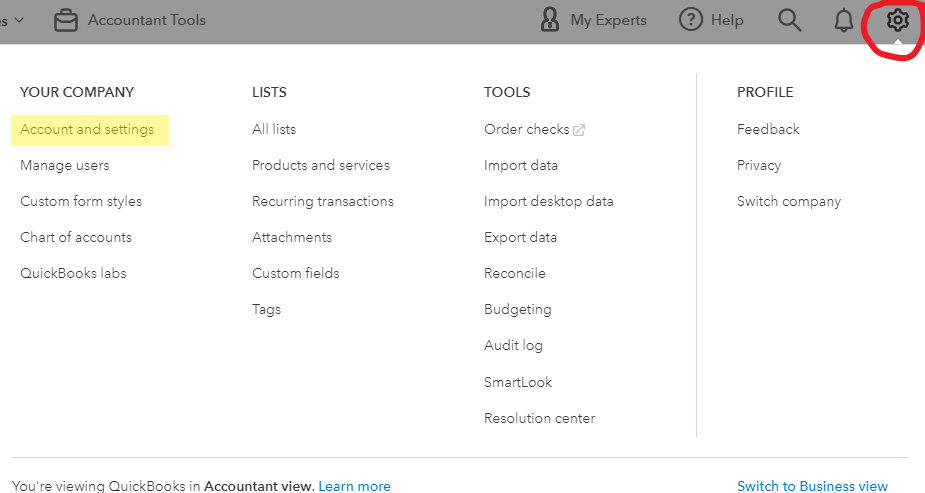
Please Note: We are viewing QuickBooks in “Accountant View.” If you switch to “Business View” some language, buttons, and menus may appear differently, although the actions and functions are identical.
Click on the Advanced tab to view the Accounting section.
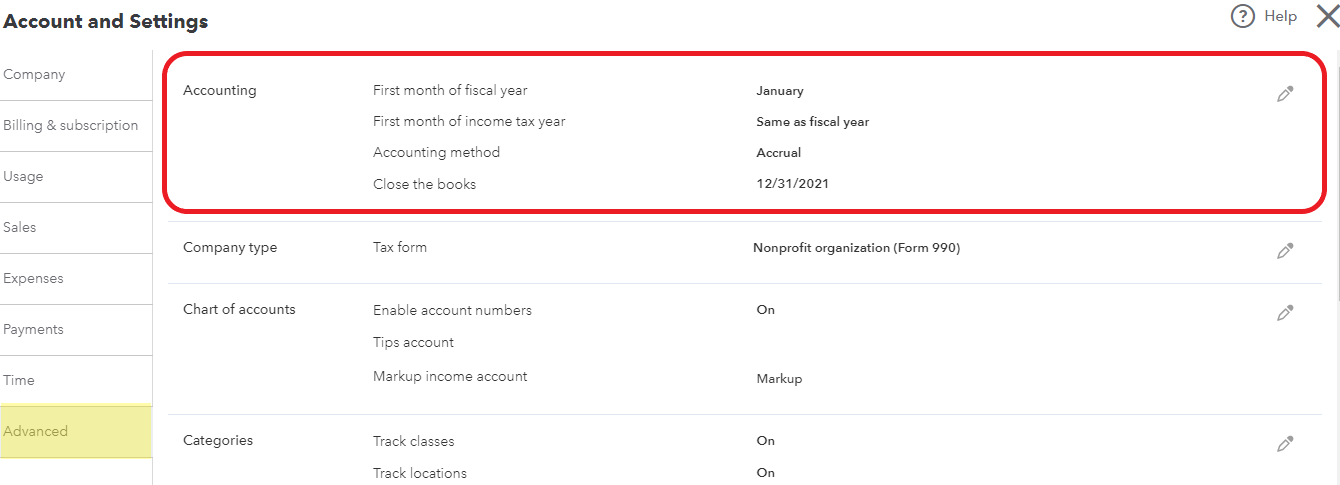
Click on the pencil icon to edit these settings.

This section allows you to set your organization’s fiscal year, tax year, and accounting method. This is also where you can choose a date to close the books. How often you close your books is up to you. Some organizations close their books annually, quarterly or even monthly.
By closing the books, you will avoid accidentally posting or editing transactions for period that has been audited or for which you have already prepared financial statements. You may choose to only see a warning before posting in a closed period, or you can require a password to prevent unauthorized changes.
Advanced Settings: Pre-Fill Forms
The next important setting to check is in the Automation section. This section is also located under the Advanced tab.

In this section, you will see the option to Pre-fill forms with previously entered content. You can change this setting by clicking the pencil icon.
If your organization has many recurring transactions, pre-filling forms can reduce the amount of time you spend manually entering transactions. For example, if you regularly pay a vendor for the same recurring product or service, QBO can automatically pre-fill the account number and class code during your next entry. When you enter the vendor’s name, these fields will automatically populate in the expense entry screen, and will be based on the account and class that were used last time. At that point, all you will need to do is update the date and amount and save.
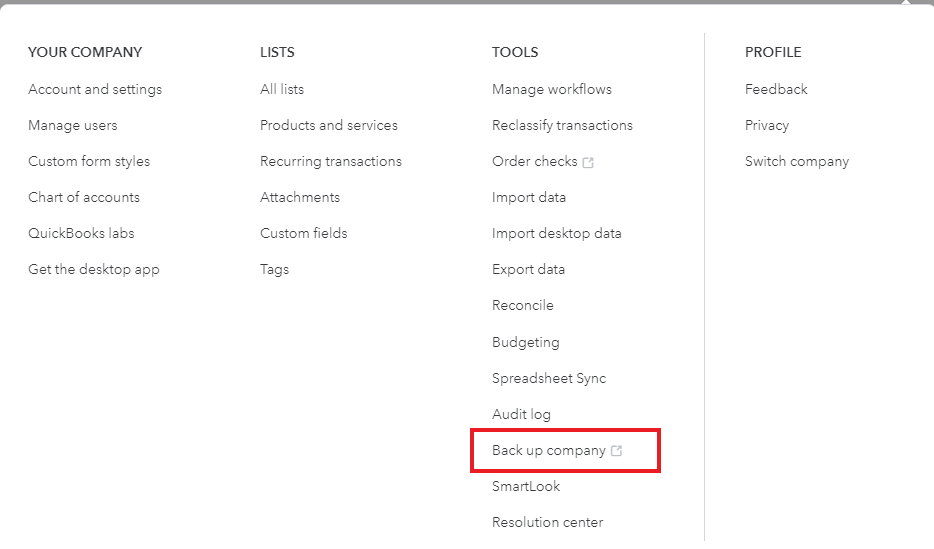
Advanced Settings: Back Up Company
The last setting is currently only available with QuickBooks Online Advanced subscriptions. If your organization uses QBO Advanced, we highly recommend that you turn on this setting.
From the gear icon, look under the Tools menu you will see an option to Back up company.
After you click on this setting, follow the on-screen prompts to set up your company backups. Once this setting is turned on, QuickBooks will automatically back up your company data, including invoices, deposits, bills, journal entries, accounts and classes, budgets, customer and vendor information, employee information, and more. (There is limited data that cannot be backed up, such as tax ID numbers, custom reports, and audit log entries.)
If necessary, you can quickly restore your QBO account from a backup – but only if this setting is switched on! For peace of mind, take advantage of the company backups included in your QuickBooks Online Advanced subscription.