In the world of cloud-based accounting software, QuickBooks Online is one of the most popular choices around – and for good reason! QuickBooks Online allows remote access to your accounting records for anyone who needs it – your employees, your bookkeeper, or your CPA. Unlike desktop accounting software, QBO makes it easy to share your accounting records and collaborate with others outside of the office.
Whether you’re just starting out with QuickBooks Online or you’ve been using it for years, here are a few tips and tricks to help you save time and work more efficiently.
1. Leverage Your Web Browser

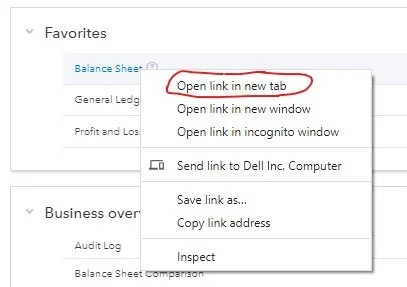
When you’re working in QuickBooks Online, there are often times when you it would be helpful to see two different reports or transactions side-by-side. An easy solution is to open a new tab in your browser. You can right-click a browser tab and select “Duplicate”, or right-click a link and select “Open link in new tab.” This will allow you have two or more tabs open at once for the same QBO account. If you’d like to compare the accounting records for two different organizations, you can use the same trick with a private browsing window – also called “incognito mode.”
2. Use Keyboard Shortcuts

When your inbox is overflowing and your desk is piled sky-high, every second counts! Shave off some time by using these keyboard shortcuts for the most common QuickBooks Online commands. (If you’re using a Mac, substitute the Option key for the Alt key.)
3. Enhance Your Reporting
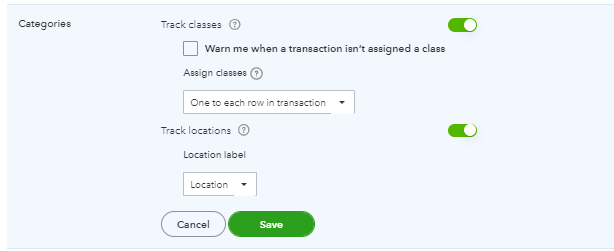
Use class codes, locations, and/or project tracking to add more layers of detail to your accounting records in QuickBooks Online – without expanding or altering your chart of accounts. Classes and projects allow you to quickly drill down into specific events or activities that may share the same account code. For example, if your organization holds an annual member conference, adding class codes will enable you to automatically filter your Profit & Loss report for each event.
4. Set Up Recurring Transactions
If you find yourself entering the same transactions over and over again, do yourself a favor and set up a recurring transaction in QuickBooks Online. You can create recurring bills, deposits, checks, invoices, and more. To create a recurring transaction, click on the Settings (gear) button. Under “Lists,” choose “Recurring Transactions.” Choose a type of transaction then set up your template with the transaction details and recurrence interval. Your transaction can be created from this template on a scheduled basis or on an unscheduled (as-needed) basis. You can also create a reminder that will notify you when it’s time to enter another transaction.
